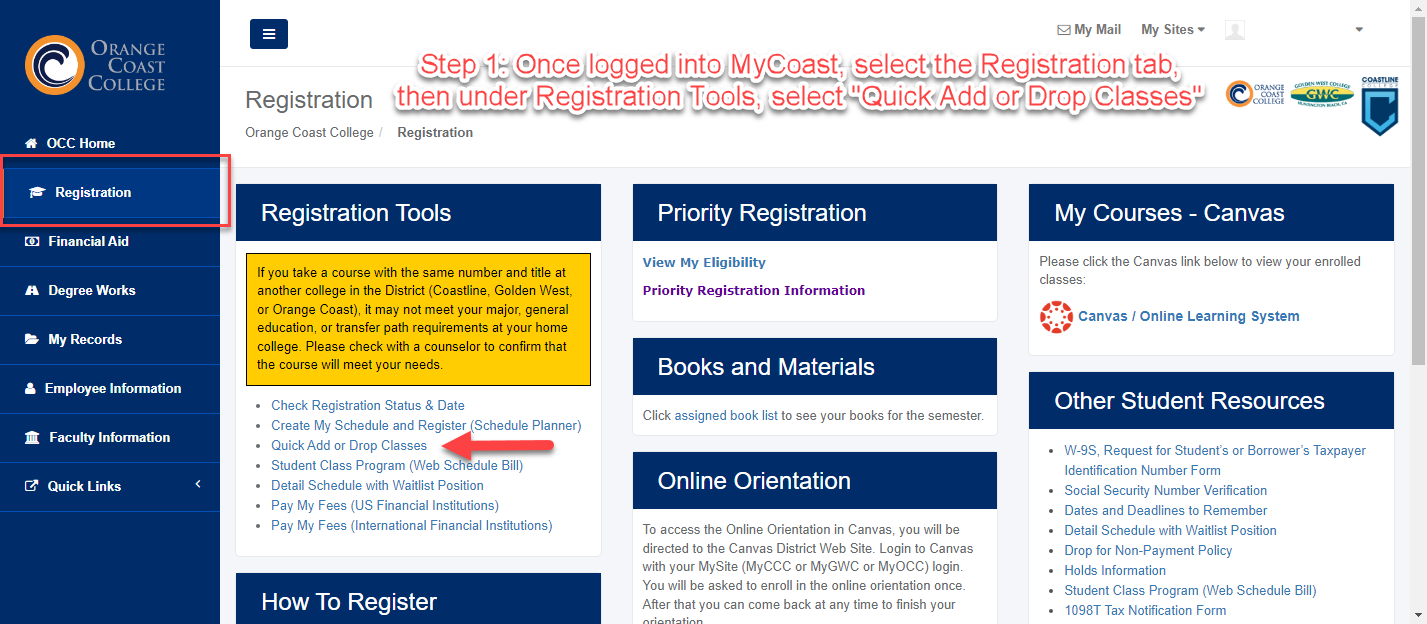
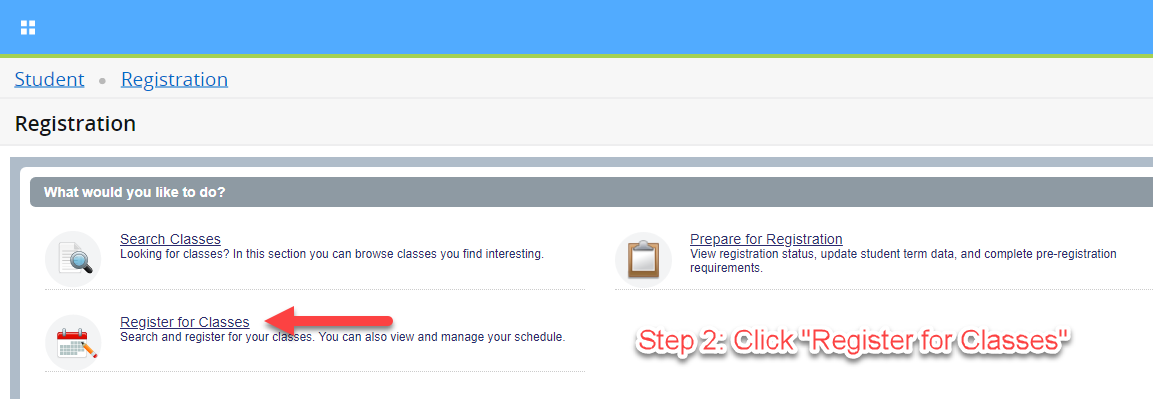
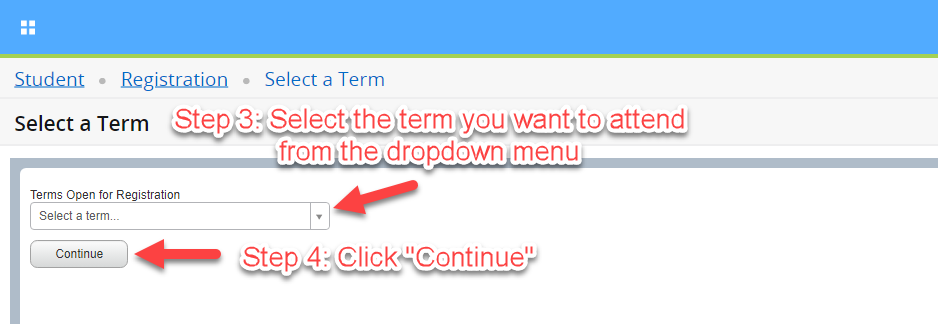
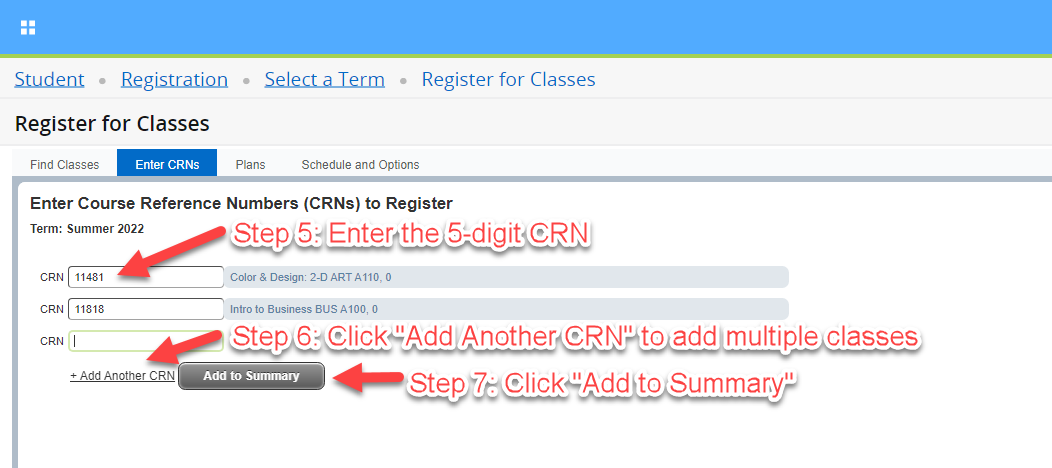
How to Add Classes
Below are step-by-step instructions on how to add a course. A PDF printable version is also available.
Confirm your Registration!
Every time you add or drop a course, we highly recommend that you confirm your transaction by viewing and printing a copy of your Class Schedule (Web Schedule Bill). Your Class Schedule (Web Schedule Bill) is proof that you registered and paid your fees. It also includes information about class meeting times, locations, as well as important drop and refund deadline dates for each class.
Class is Waitlisted?
Here's how to add yourself to the waitlist and how the waitlist process works.
Have an Add Permit?
We also have step-by-step instructions on how to add a course using an Add Permit/Code.